UI:


I've finally released a test version!
It'll improve as I get time :)
Please free to send me feedback

The script has 3 main features:
- First, you can create new XML files with your bake settings (lowpoly, highpoly, etc) by hitting Write to Bake file
(Note xNormal's can do this already in Settings&Examples->Load/Save Settings. I just wanted a bitesize UI to access most of the options you'd need. For more advanced options, use xNormal to create these files) - Second, you can hit Batch Bake XML's to sequentially bake a selection of bake files in xNormal's commandline mode
- Third, once you've baked maps either via this app, xNormal, or whatever, you can combine them all in photoshop using an embedded script with the combine to psd button
Note there are other tools that use these same features, and some of them may be better depending on your needs!
Trebor777's awesome xNormal batcher,
Froyok's froXnormal for Maya,
or Airborn Studios' Backstube are a few, use the tool that best fits your needs :)
This release is early so use at your own risk!
I'm just uploading it incase someone may benefit from it
Please send me any feedback you have :)
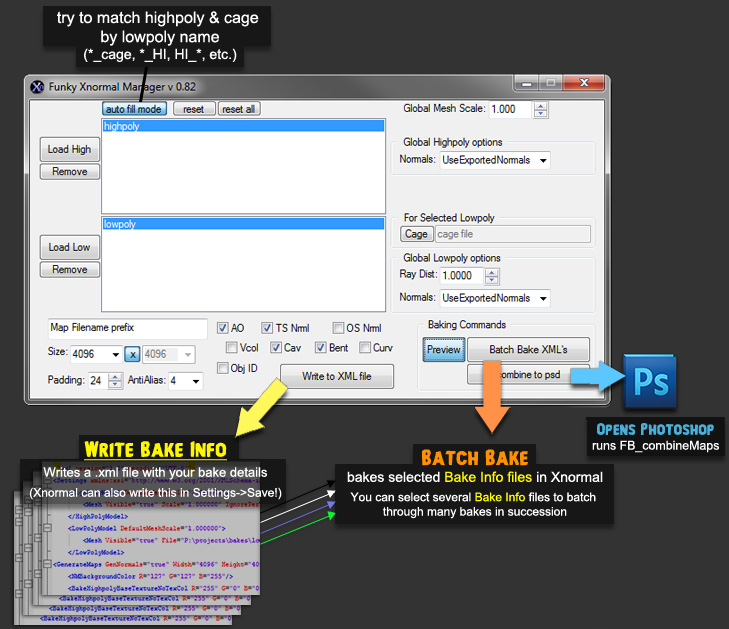
Extra Details for Writing Bake Files (XML's):
- When selecting a lowpoly or highpoly mesh with auto fill mode on, it'll try to match any existing highpoly, lowpoly, or cage meshes based on name
- When writing bake settings with both AO and Vertexcolor or Tangent Normals vs. Object Normals, etc. The script will automatically create a separate bake file for them so you don't have to manually alter settings!
- Right clicking on any mapTypes will bring up a few common settings that you may want to change (be careful, right now there is only minimal error checking to see if you entered an invalid value!)
- whenever you want to clear your high, low, and cage lists just hit Reset
- And whenever you want to re-initialize all of your settings, just hit Reset All
- The app will allow you to cancel the bake process if you want, but it'll try to notify you of any errors during the batchbaking process and give a rough estimate of how much longer it'll take
- A photoshop script autoInstalls, and can later be loaded from File->Scripts->FB_combineMaps
read more about it in the FB combine Maps section! :)
Latest update notes (v0.82)
- (v0.82) created firstpass UI for 'preview mode' options
- (v0.82) fixed string parsing for filepaths with spaces in the name
- (v0.81) fixed undeclared variable in BatchBake option
- (v0.80) created 'preview mode' which will override mapsize and what maps to bake and raycasts
- (v0.80) no UI for this feature either, but you can also edit prefix/suffixes in the settings file
- (v0.80) detects xNormal's original settings better
- (v0.80) more extensive checks for FB_combineMaps installation
- (v0.77) added FBX cage meshes and put in an objectID maptype option
- (v0.76) fixed bug where it'd error if you did a specific sequence of high poly loads
- (v0.75) Fixed bug where highpoly list didn't show horizontal scrollbar
- (v0.74) Now takes default settings from last used xNormal settings
Particularly useful for inorganics and stylized stuff, it makes selected poly components planar on X, Y, Z, or an arbitrary 'Best' plane
Running FBpolyPlanarizeSetup will create the option in an FBTools menu and apply it to the userSetup.mel - or you can do it manually.
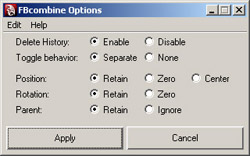
With FBcombine you have options to retain properties of your first selected object
- delete history or not
- toggle and run Separate if only 1 object selected
- retain, ignore, or center Pivot
- retain or ignore rotation
- retain or ignore previous parent
Just drop FBcombine.mel into mydocuments/maya/X.X/scripts/ and type FBcombine in the commandline.
It'll appear in the FBTools menu
Latest update notes
- (v1.2) made the split/combine renaming toggle work better and fixed a bug where it would fail to rename and cleanup combined objects if there were other objects with the desired name
- (v1.1) added support for retaining names and a few more error checks
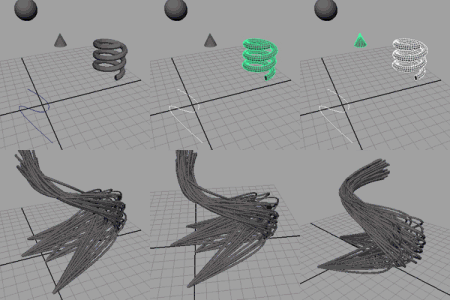
It may take some getting used to, but in the end I hope it helps speed up your workflow by eliminating repetitive selections. It's all done in mel, so there are a host of settings to minimize any speed decrease. Instructions are included in the zip
NOTE: (script is deprecated)
This type of functionality is available by default in newer versions of maya, and I don't recommend using it with those versions! It's slow and could interfere with the default functionality
Options will appear in a FB Tools Menu Add FBlocalTumble to userSetup.mel to install, or run this code in the script editor or edit the usersetup.mel file manually.
Latest update notes
- (v1.2) fixed to work properly with Maya 2013+
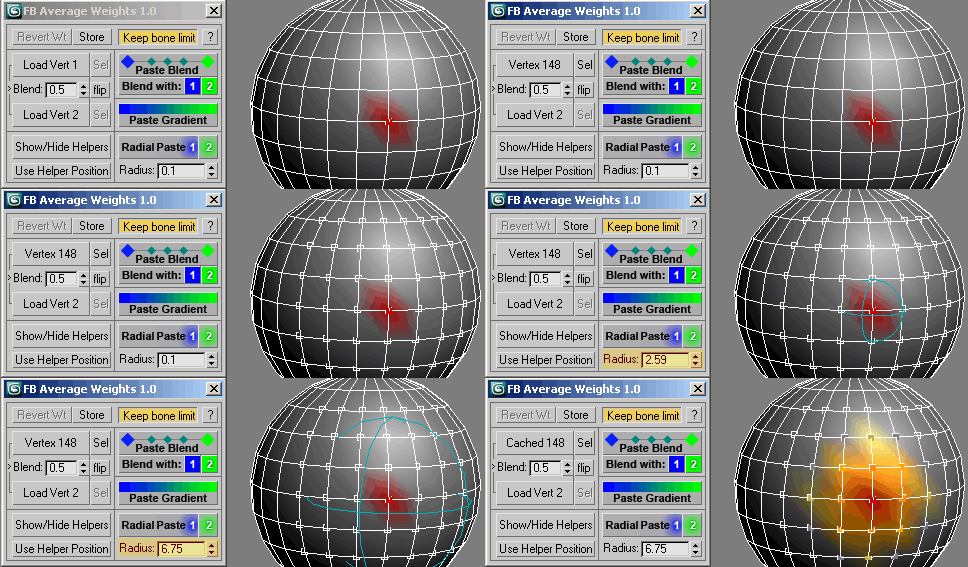
- Paste a blend onto selection.
- Paste a gradient between 2 skinverts on selected skinverts
- Radial Blend to add a weight based on distance
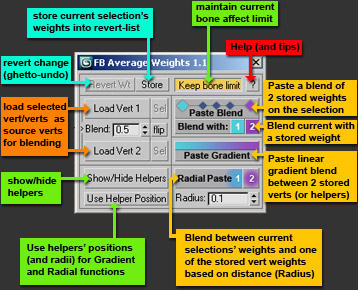 View the videos and images at the right for more.
 How to Use:
- Select a mesh or poly sub-object (vert,edge,face)
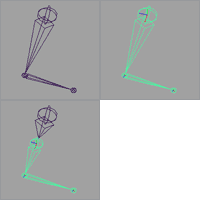
- Run the script to align either a Working Pivot or the Object Pivot to it as defined in the image below.
- Run the script again to return to your previous pivot
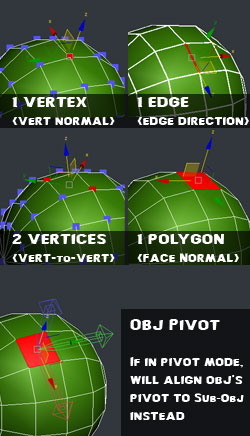
Latest update notes (v1.1)
- (v1.1) fixed bug in 3ds max 2015+ when toggling working pivot mode
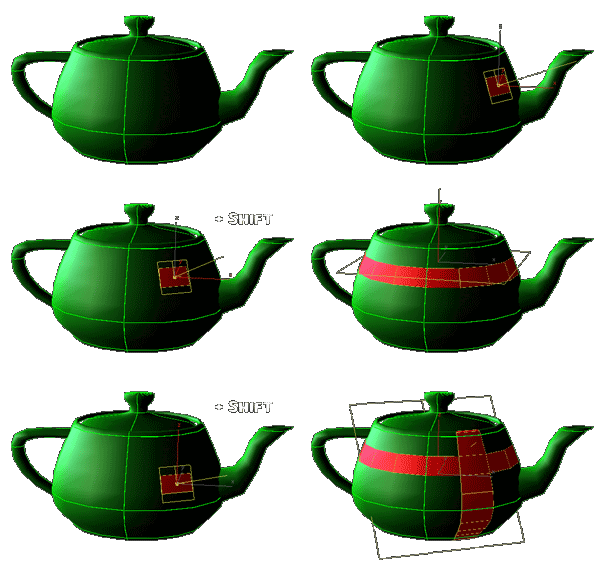 How to Use:
- Download FB_quickLoopRing.ms and drop into
...ProgramFiles/Autodesk/3dsMaxXXXX/Scripts/Startup/
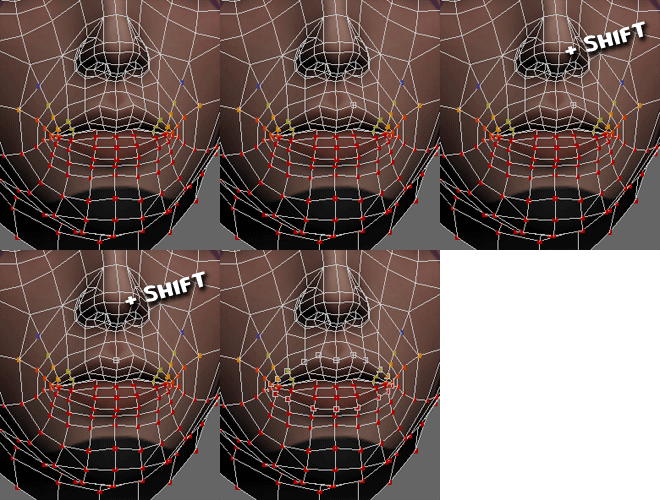
and restart Max - Select a subobject in Unwrap UVW or Skin Modifiers
- then hold shift while selecting an adjacent subobject and it'll add the vert,edge,face loop to your selection
- Looping will occur on the Geo-level if picked in viewport and UV-level if picked in editor*
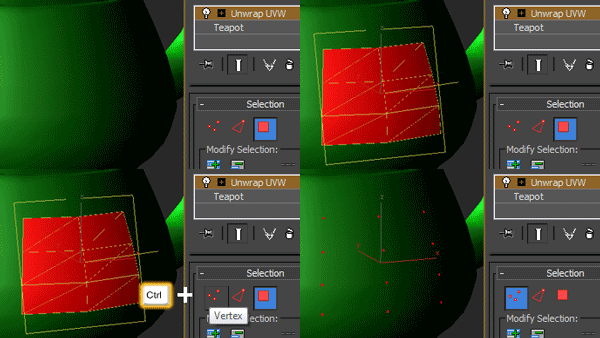 How to Use:
- Download FB_UVconversion.ms and drop into
...ProgramFiles/Autodesk/3dsMaxXXXX/Scripts/Startup/
and restart Max - Select a subobject in the Unwrap UVW modifier
- then hold ctrl while changing subobject mode and your selection will be converted
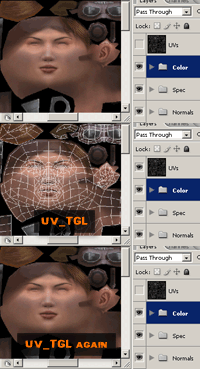
UV, UVs, UV's, or prefixed with TGL_
by default it searches only for the first layer, but you may change the variable near the top to run on all UV layers.
That can get slow on hefty PSD's though, so it's not advisable! Save to C:/Program Files/Adobe/PS CS3/Presets/Scripts
and it'll appear in File->Scripts. You can also set it to a hotkey at Edit->Keyboard Shortcuts
ex1: store/fetch which references you have open for a large illustration you're doing
ex2: storing all 12 textures you're working on for a particular 3d environment, character, etc.
Scripts included:
- FB_StoreDocs - Stores open documents to a global temp file
- FB_FetchDocs - Re-opens stored documents from a global temp file
- FB_StoreDocsAs- Stores open documents to a Custom location (ex. project-specific)
- FB_FetchDocsAs - Re-opens stored documents from a custom .PSdocs file
and they'll appear in File->Scripts.
You can also set hotkeys or set a script to run on startup
(more instructions in Readme.txt)
Just a super simple script I did for a buddy :)
Save to C:/Program Files/Adobe/PS CS3/Presets/Scripts
and it'll appear in File->Scripts. You can also set it to a hotkey at Edit->Keyboard Shortcuts
(particularly made with Xnormal bakes in mind)
Combine images to generate a new PSD or update an existing PSD
When updating, if it already finds an existing layer it'll ask if you:
- want to Hide the originals
- Delete the originals
- or Ignore the originals and just keep updating
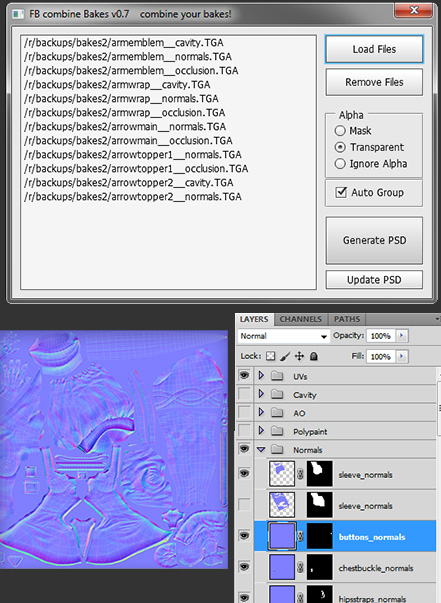 Save to C:/Program Files/Adobe/PS CS3/Presets/Scripts
and it'll appear in File->Scripts. You can also set it to a hotkey at Edit->Keyboard Shortcuts
Latest update notes (v0.92)
- (v0.92) fix for non-RGB images before copying to the combined document
- (v0.92) Continue option on duplicate layer prompt was fixed
- (v0.91) color-coding for different map-types
- (v0.9) fixed various map interpretation bugs
- (v0.9) created confirmation window for resized maps
- (v0.9) created special cases for bent/object normals
- (v0.9) converted stuff from DOM to AM, hopefully faster!
- (v0.77) fixed file loader so everything should work for CS3!
These are probably nothing fancy, but just dumping a few zbrush brushes I made or modified that could be useful for somebody out there :)

Brush for making various curls, originally used for curly hair in my Yin Yang girls timelapse

Ben 'Makkon' Hale's awesome hair curve brush which I modified a bit
(you can download his original version here)
I stole the alphas from Andy 'Mr. Kite' Nisbet's great Zbrush 3 UI




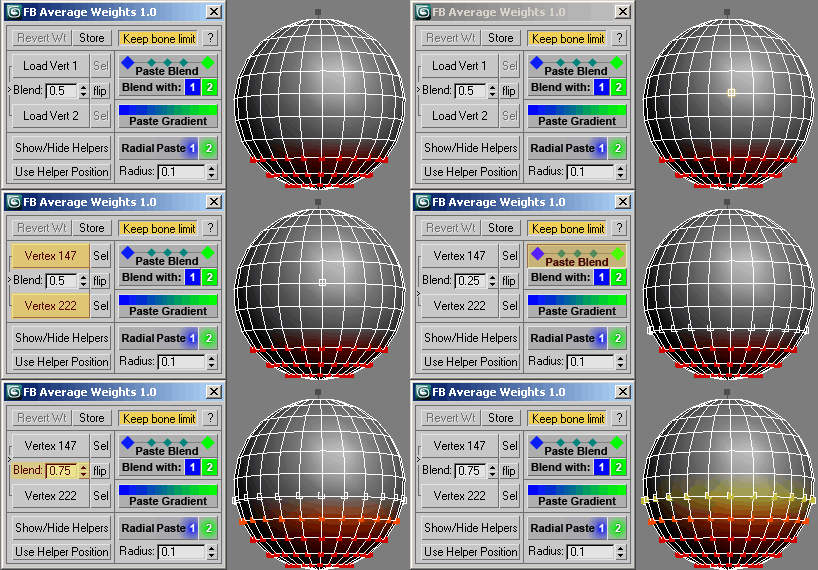
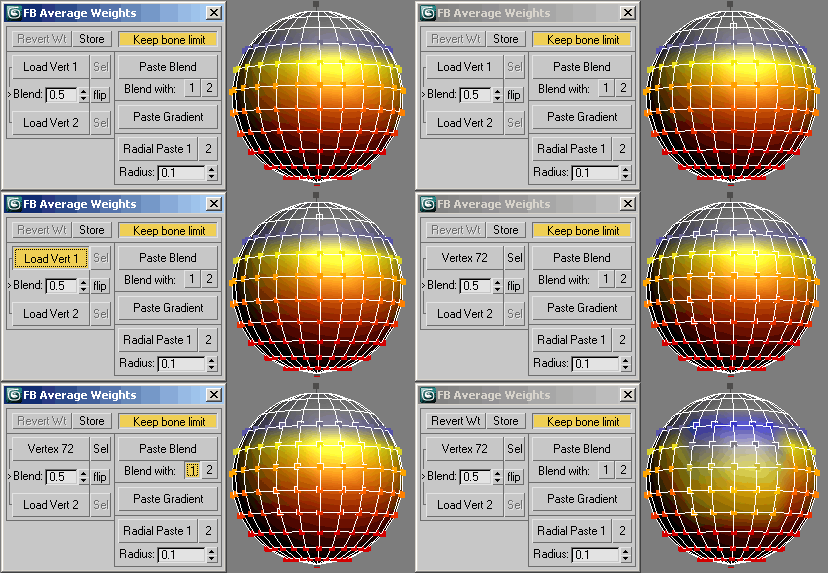
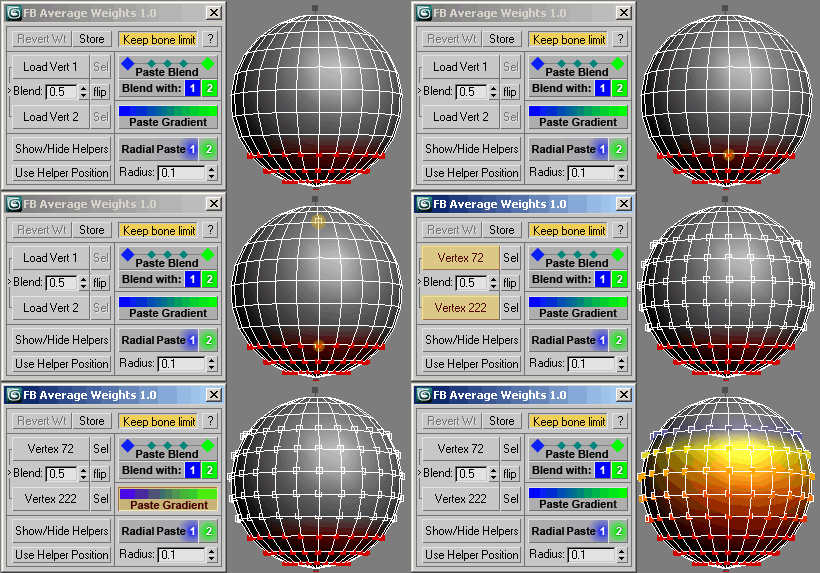
 but give this toolset a shot and you'll see there's much more you can do :D


